Library Bag ~ Easy Unlined Book Bag ~ Tutorial
If you can sew a straight line, you can whip up an unlined library, or book bag. This is a very easy project - perfect for someone who is new to sewing.

Here in Australia, Primary School aged children require a library bag to enable them to borrow books from the school library. Read on to see just how easy it is...
Materials:
Any reasonably sturdy fabric that is washable- Two pieces of fabric: 16" x 13" (41cm x 33cm) - for the bag body
- Two pieces of contrasting fabric: 16" x 2" (41cm x 5cm) - for the facing
- Two pieces of fabric: 11½" x 4" (30cm x 10cm) - for the handles
Finished Dimensions
- 15½" x 12½" (39cm x 32cm)
Instructions:
Read all instructions before you begin.
All seams are ⅜"(1cm), unless otherwise indicated.
Basting (hand sewing with a long stitch), is a good way to hold seams together while sewing two pieces of fabric together. The fabric won't move, and you don't have to worry about keeping pins away from the machine needle. Another good alternative is wonder clips. If you do use pins, remove them as you sew - keep them well away from the presser foot - don't sew over them!
Sew Seams...
- Place the two pieces of fabric right sides together.
- Sew down both side seams and across the bottom with a regular stitch.
- Backstitch when stopping and starting
- Neaten edges with an overlocker (serger) or zig zag stitch
Sew the Handles...
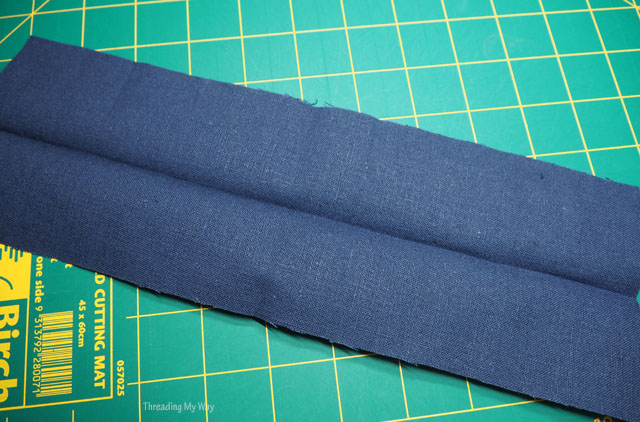
- Fold in half lengthwise and press, either with an iron or finger press.
- Open out so you can see the crease.

- Fold each half in to meet the crease and press.

- Fold in half.

- Topstitch ⅛" (3mm) from the edge, on both sides of each handle. Increase stitch length to 2.8 for the topstitching.
- Reinforce the bag handles by sewing a few lines of stitching along the length of each handle.
Attach Handles...


- Make a mark 3½" (9cm) from each side seam - on the right side of the fabric.
- Place the outside of the handles on the 3½" mark.
- Sew the handles to the exterior. If you pin, remove them as you sew - keep them well away from the presser foot - don't sew over them!
- Sew back and forth a few times to reinforce.
Sew Facing...


- Sew the short ends of the facing.
- Neaten.
- Turn a ¼" (6mm) hem on the bottom of the facing - either press or stitch.
- Place the right side of the facing on top of the right side of the bag, lining up the side seams and with the handles sandwiched between.
- Face the seams in opposite directions.
- Move the machine needle two notches to the left so the seam is slightly wider than ⅜"(1cm). If your machine doesn't have this feature, just sew slightly wider than ⅜"(1cm).
- Sew back and forth over the handles a few times to reinforce.
- Fold the facing to the wrong side.
- Press the top edge of the bag.
- Increase stitch length to 2.8
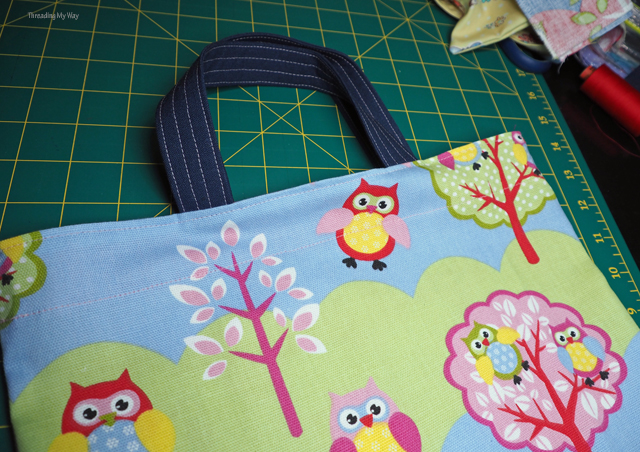
- Topstitch ⅛" (3mm) from the edge, around the top of the bag.
- Sew the the bottom edge of the facing in place.
That's it - you have finished!
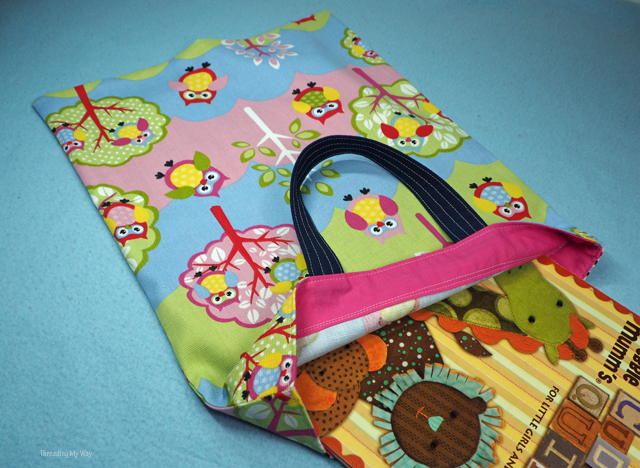
The photo above is of one of the other bags I made at the same time. It's the only photo showing the facing on a finished bag. If you look closely, you can see two lines of stitching at the hem. It looks nicer with one, but for speed I stitch the first turn over of the hem, rather than press.
This tutorial was started in January of this year. Three unlined bags, along with lined library bags, were sent to Sewing for Charity Australia a long time ago.
If you're after a lined library bag, check out my Lined Library Bag Tutorial.

I adore that owl fabric, but now only have small pieces left. Many moons ago, my daughter and I used to make and sell skirts from the same fabric. I've since written a tutorial - Simple Gathered Skirt with Embroidered Band.
Do kids where you live need library bags for school?
... Pam
| Tweet |